
Dealer guide
Faster photos with Cloud Images (Cloudflare)
Move your vehicle photos to your own Cloudflare account so they load faster and don't fill up your server. About 30–45 minutes. Pro plan add-on.
You need:A free Cloudflare account with your domain on it · WordPress admin login · the Car Lots Cloud Images plugin installed · Notepad to keep two keys
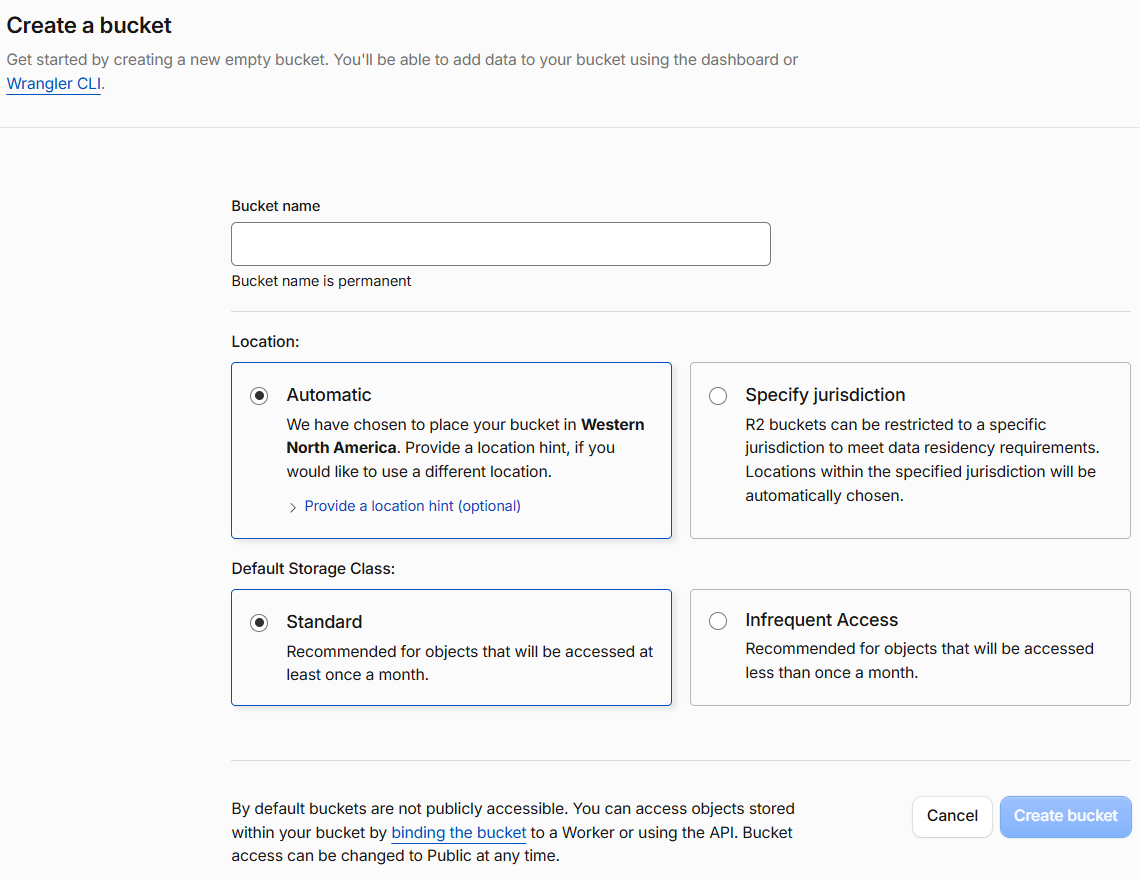
Step 1 – Create a photo bucket
- In Cloudflare: R2 Object Storage › Create bucket.
- Name it (e.g. yourdealer-photos), leave the rest, click Create bucket.
Step 2 – Give it a photo address
- Open the bucket › Settings › Custom Domains › + Add.
- Type a subdomain, e.g. photos.yourdealer.com, click Continue › Connect domain.
- "Initializing" is normal – keep going. After a few minutes it says Active.

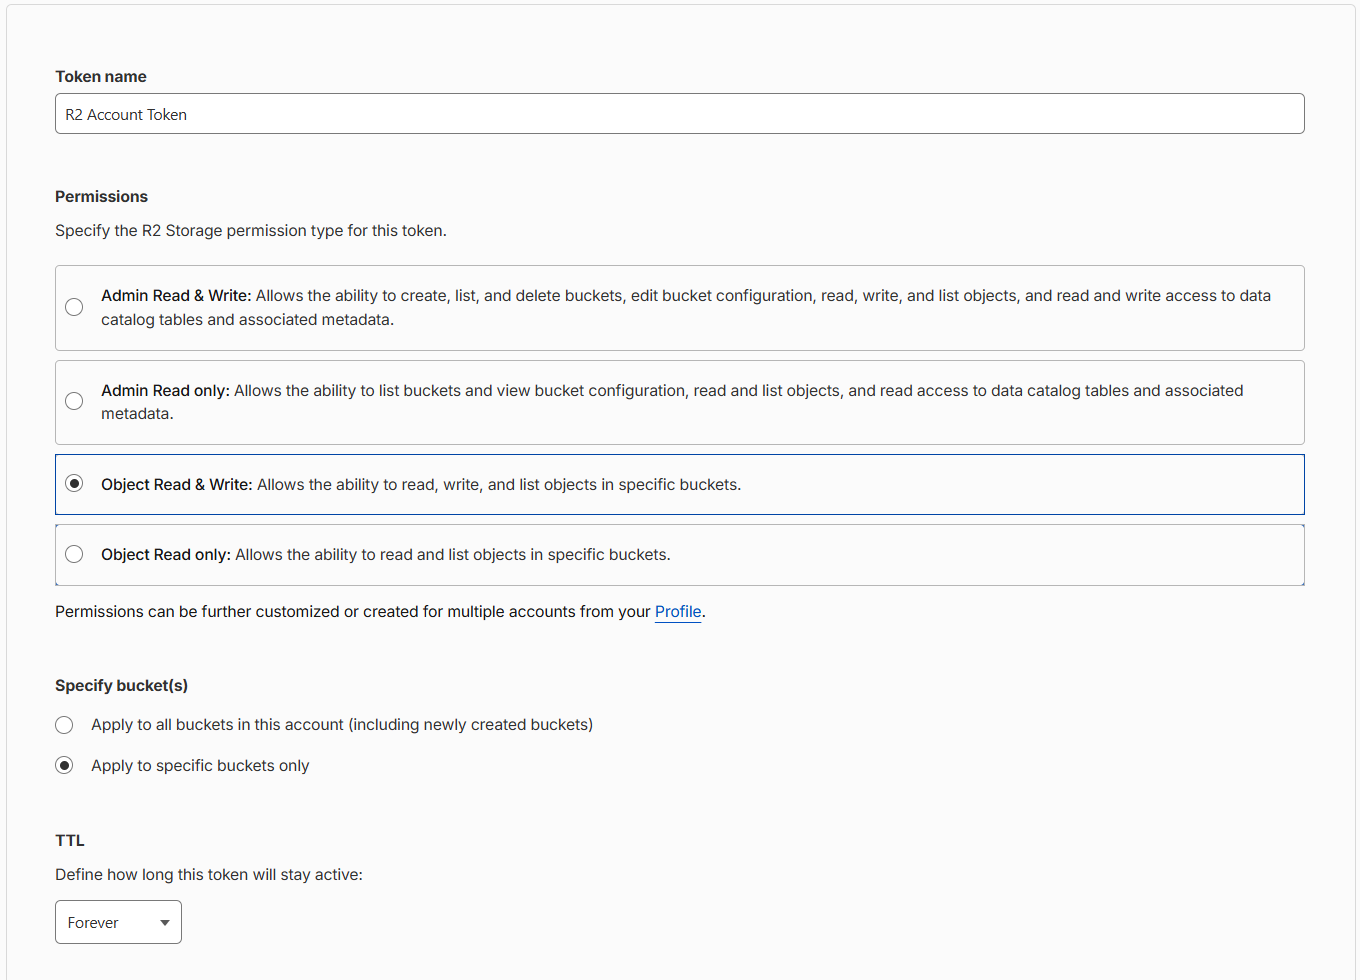
Step 3 – Create an API key
- R2 › Manage API tokens › Create Account API token.
- Permissions: Object Read & Write · Apply to specific buckets only › your bucket · TTL Forever.
- Click Create. Copy the Access Key ID and Secret Access Key into Notepad before you click Finish (the secret is shown once).
Step 4 – Connect WordPress
- Go to Settings › Cloud Images. Mode: Bring Your Own.
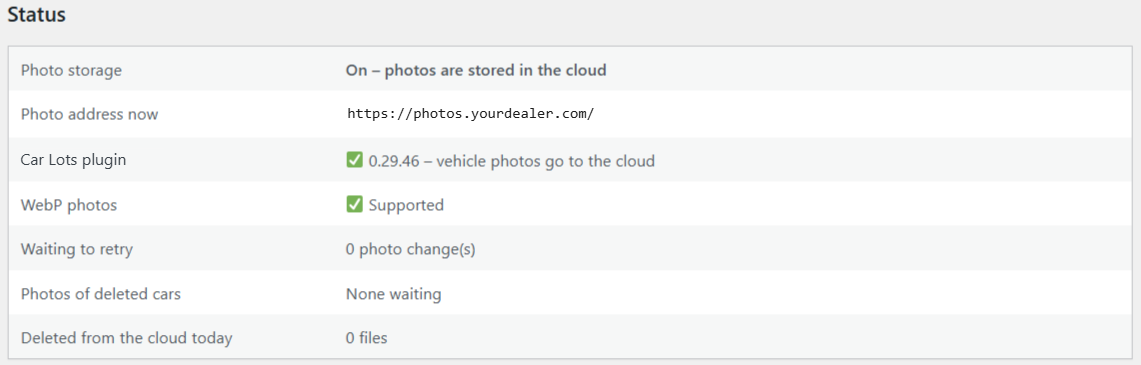
- Fill in your Cloudflare account ID, bucket name, both keys and the photo address (https://photos.yourdealer.com/).
- Click Save & Test Connection. You should see 6 green checks.
Step 5 – Move your photos
- Click Move existing photos to cloud.
- A progress bar shows "Moving photos… X of Y files". It runs in the background – you can close the page. Thousands of photos take a few hours.
- When it's done, the photo address switches by itself and a green ✓ shows next to Cloud Images in the menu.

Done right? Open a car on your website, right-click a photo › Open image in new tab. The address starts with your photo address.
Later: after a few days, Delete local copies frees up your server. Turning Cloud Images off? Click Move photos back to this website first. Cloudflare R2 is usually $0/month for a dealer's photos. Full details: Dealer guide, section 13.