
Set up your website email
Your website sends you every lead and sends shoppers a "We got your request" email. Connect it to your email account so these arrive and don't land in spam. About 10 minutes.
Step 1 – Turn on FluentSMTP (free)
FluentSMTP comes with your website. You just switch it on.
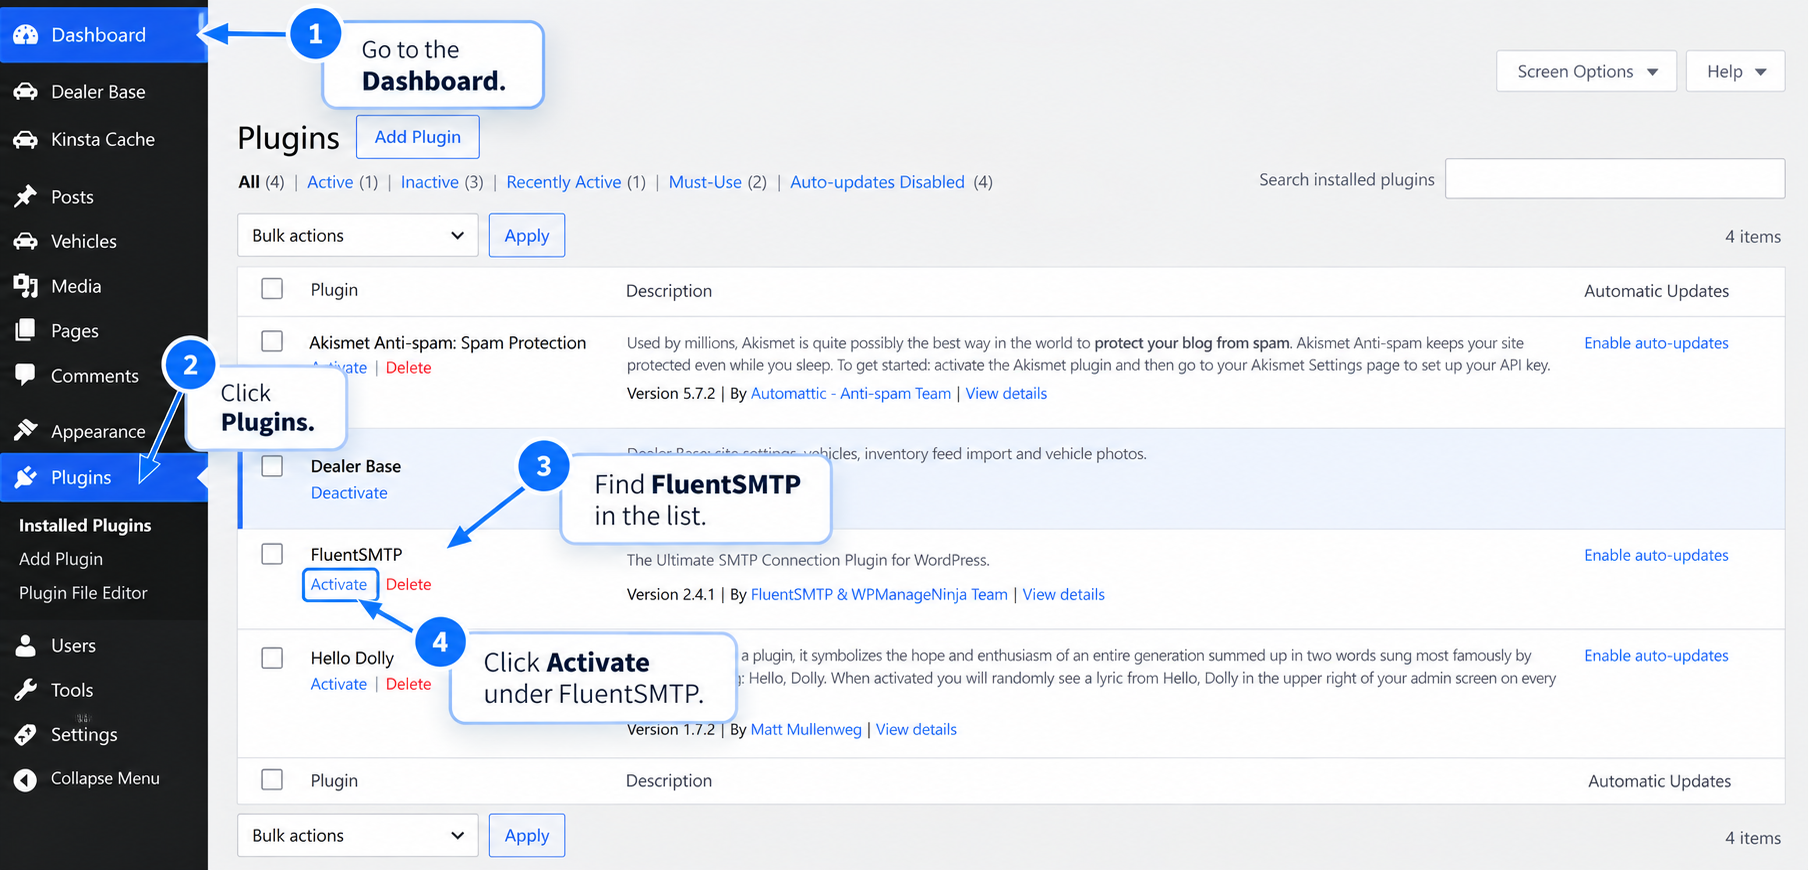
- Log in to WordPress so you see the Dashboard.
- In the left menu, click Plugins.
- Find FluentSMTP in the list. (Car Lots should already show Deactivate – that means it's on.)
- Click Activate under FluentSMTP.
Step 2 – Turn on Google 2-Step Verification
Using Gmail or Google Workspace? Google needs this before it lets your website send email.
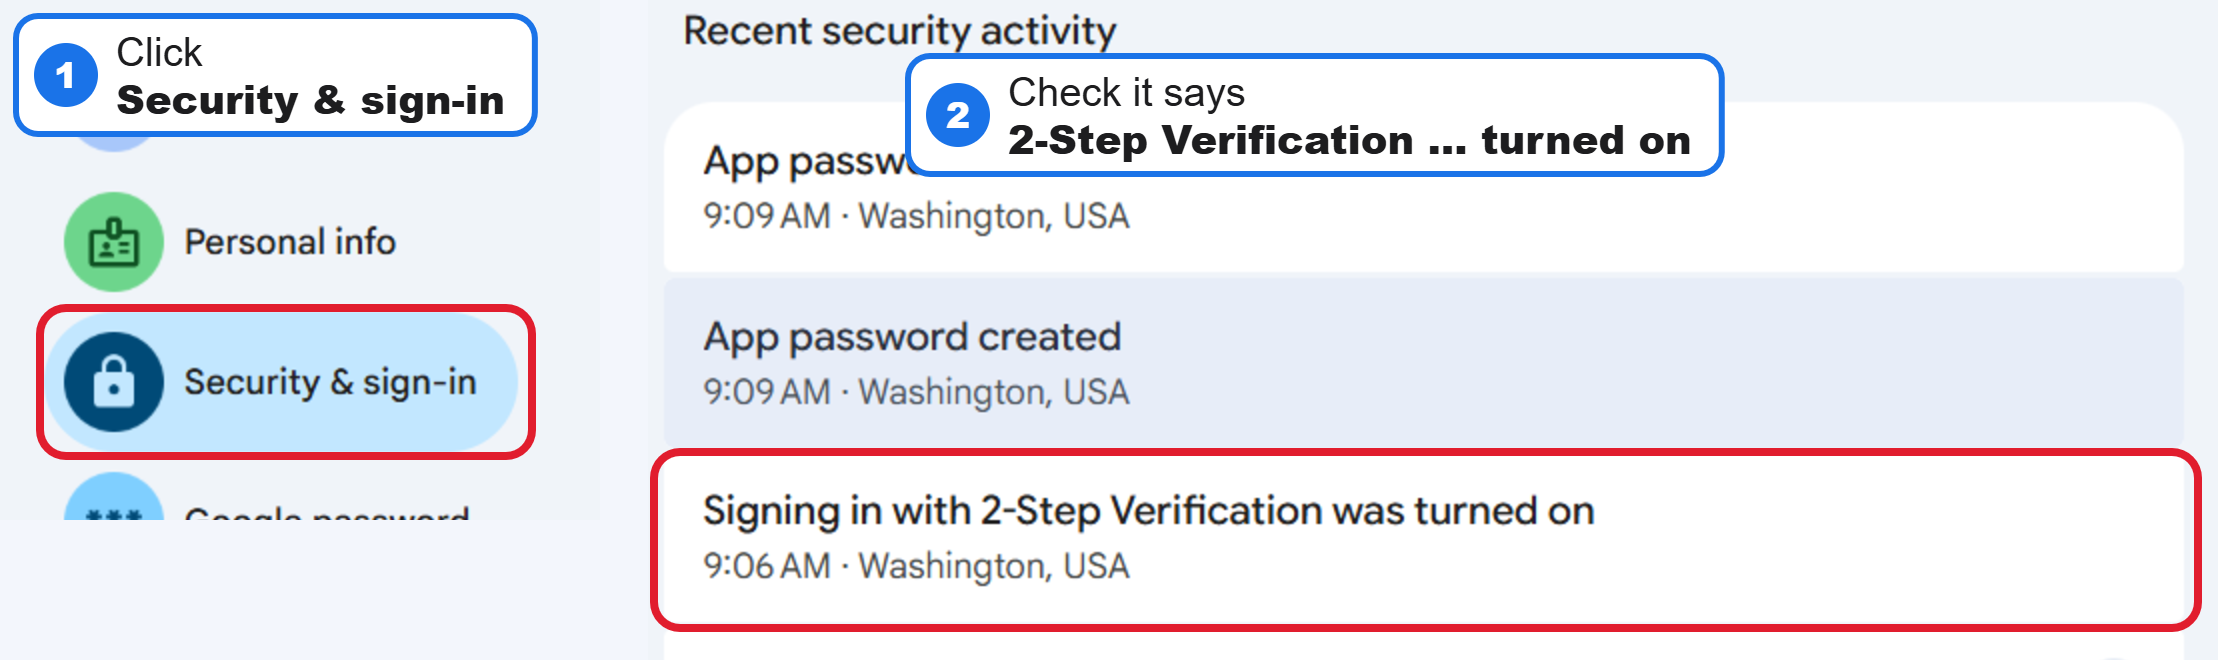
- Go to myaccount.google.com/security (in the menu it's called Security & sign-in).
- Click 2-Step Verification and turn it On. A text code or the Google prompt on your phone works. (A passkey alone doesn't count.)
- Done right? "Recent security activity" shows Signing in with 2-Step Verification was turned on.
Step 3 – Create an app password
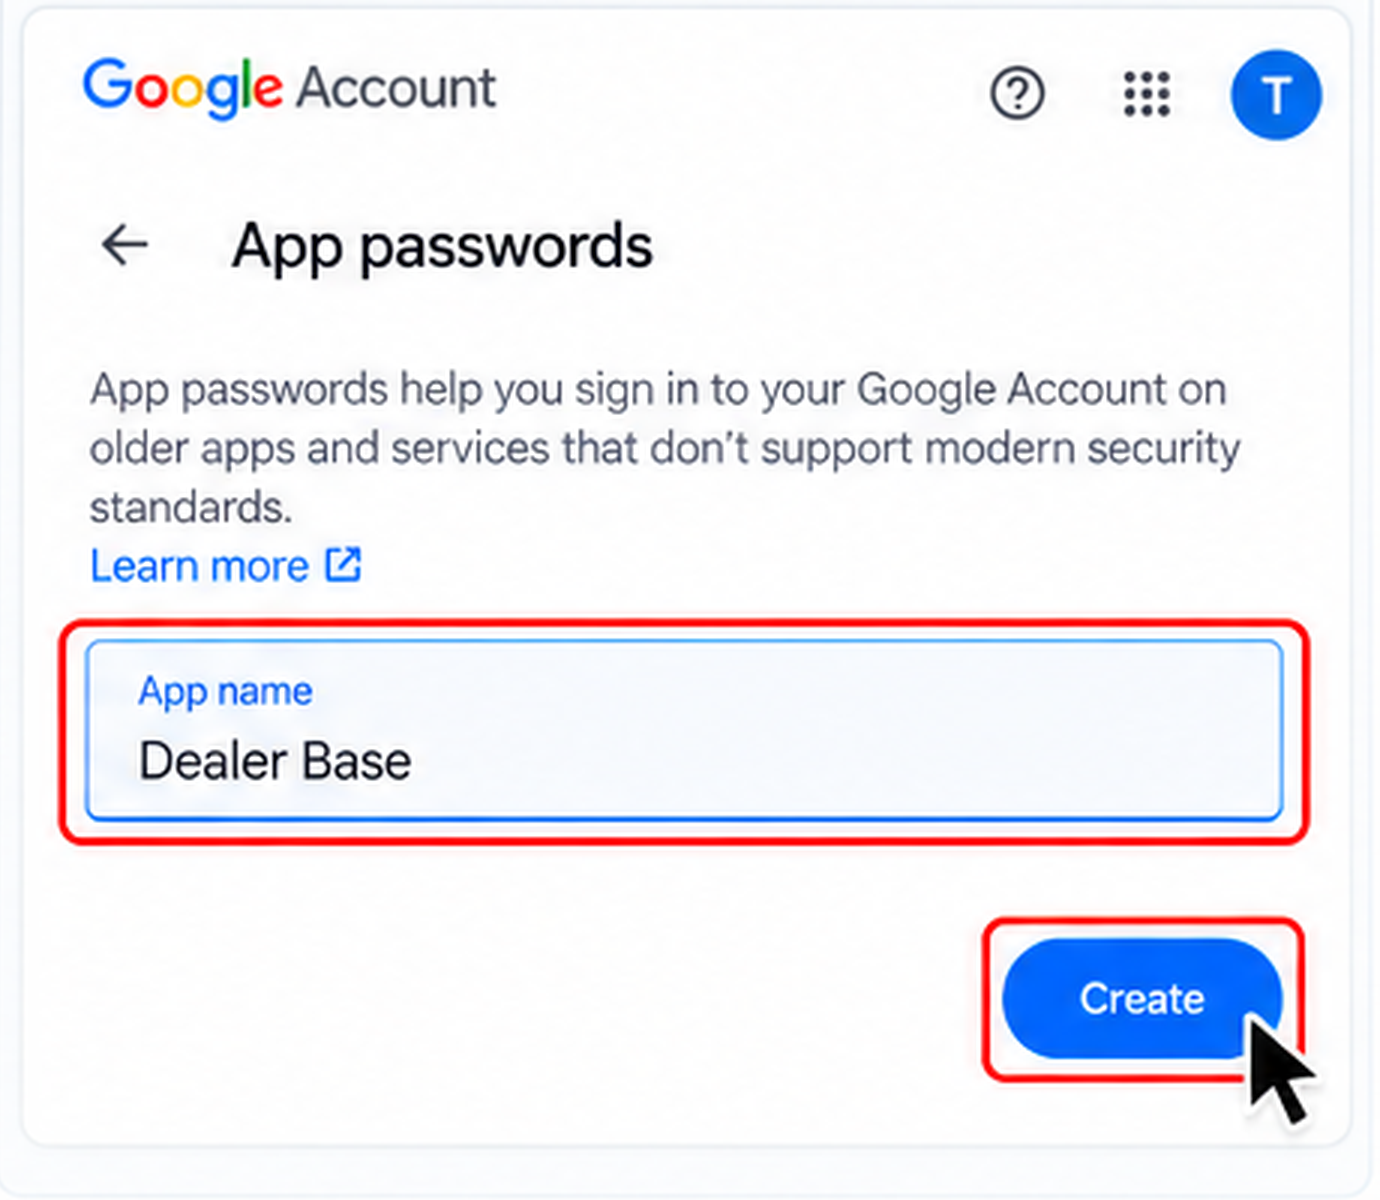
3a. Go to myaccount.google.com/apppasswords (or on the Security & sign-in page, search "App passwords" at the top). Type Car Lots as the App name and click Create.
3b. Google shows a 16-character code. Copy it – Google shows it only once.
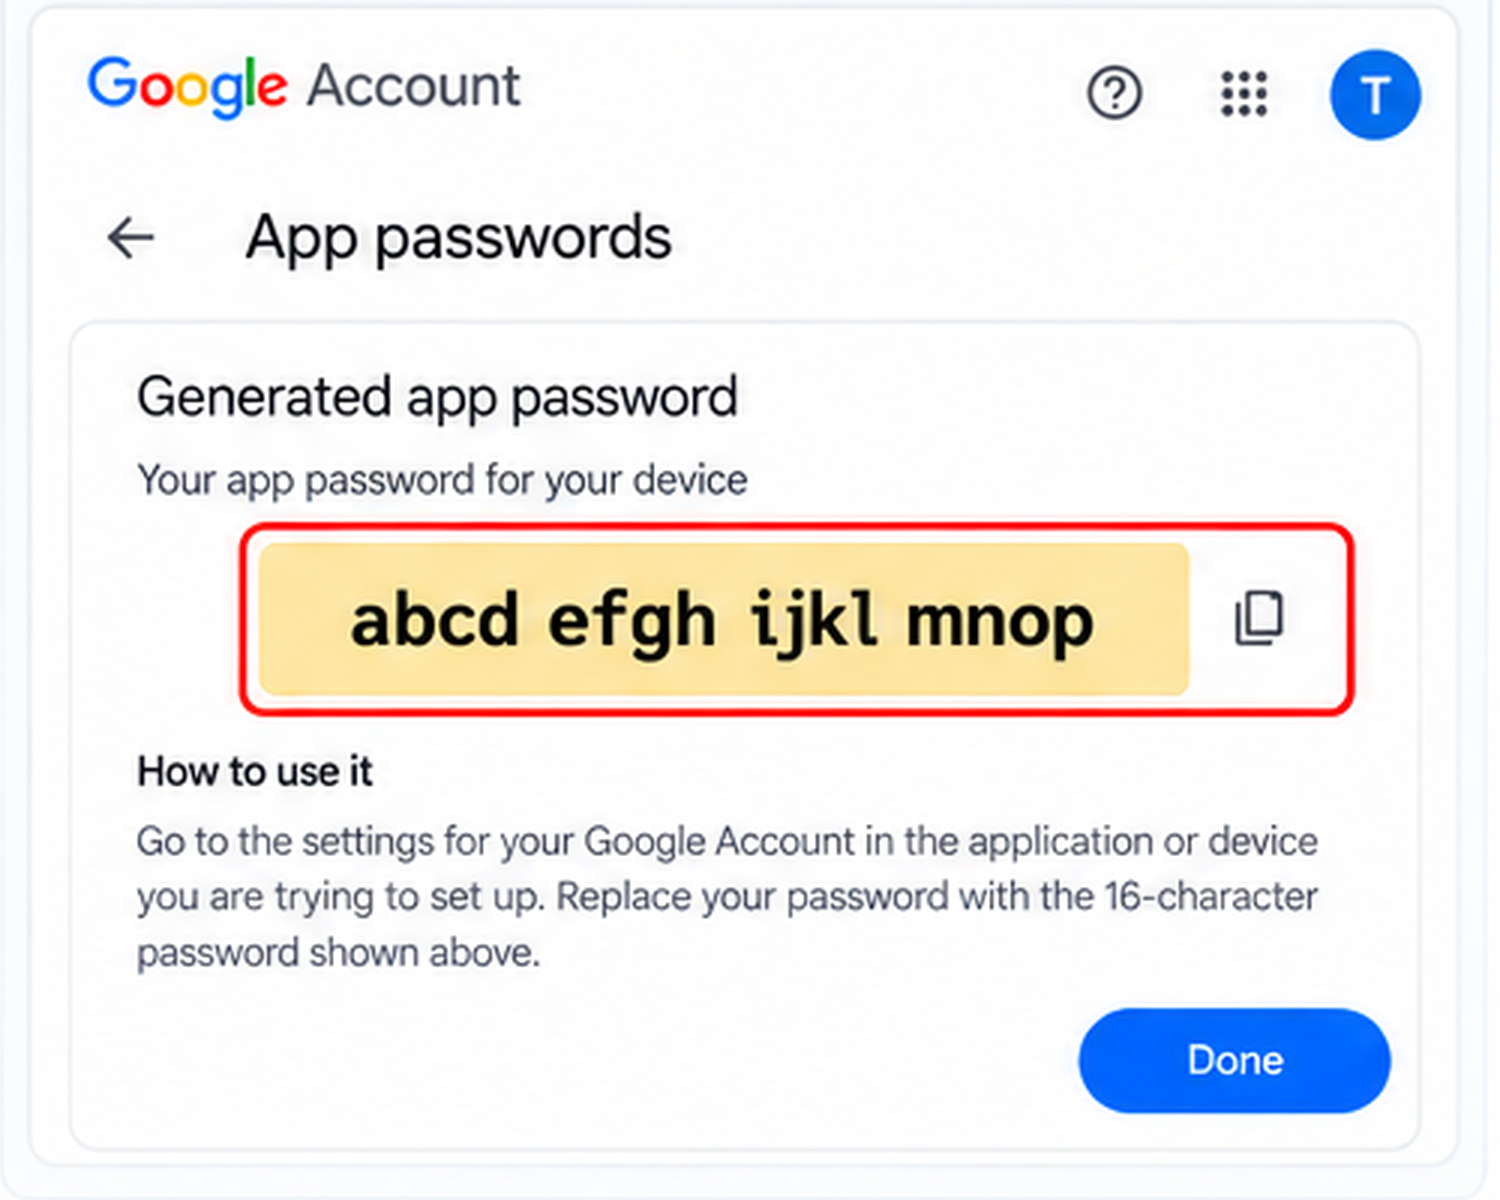
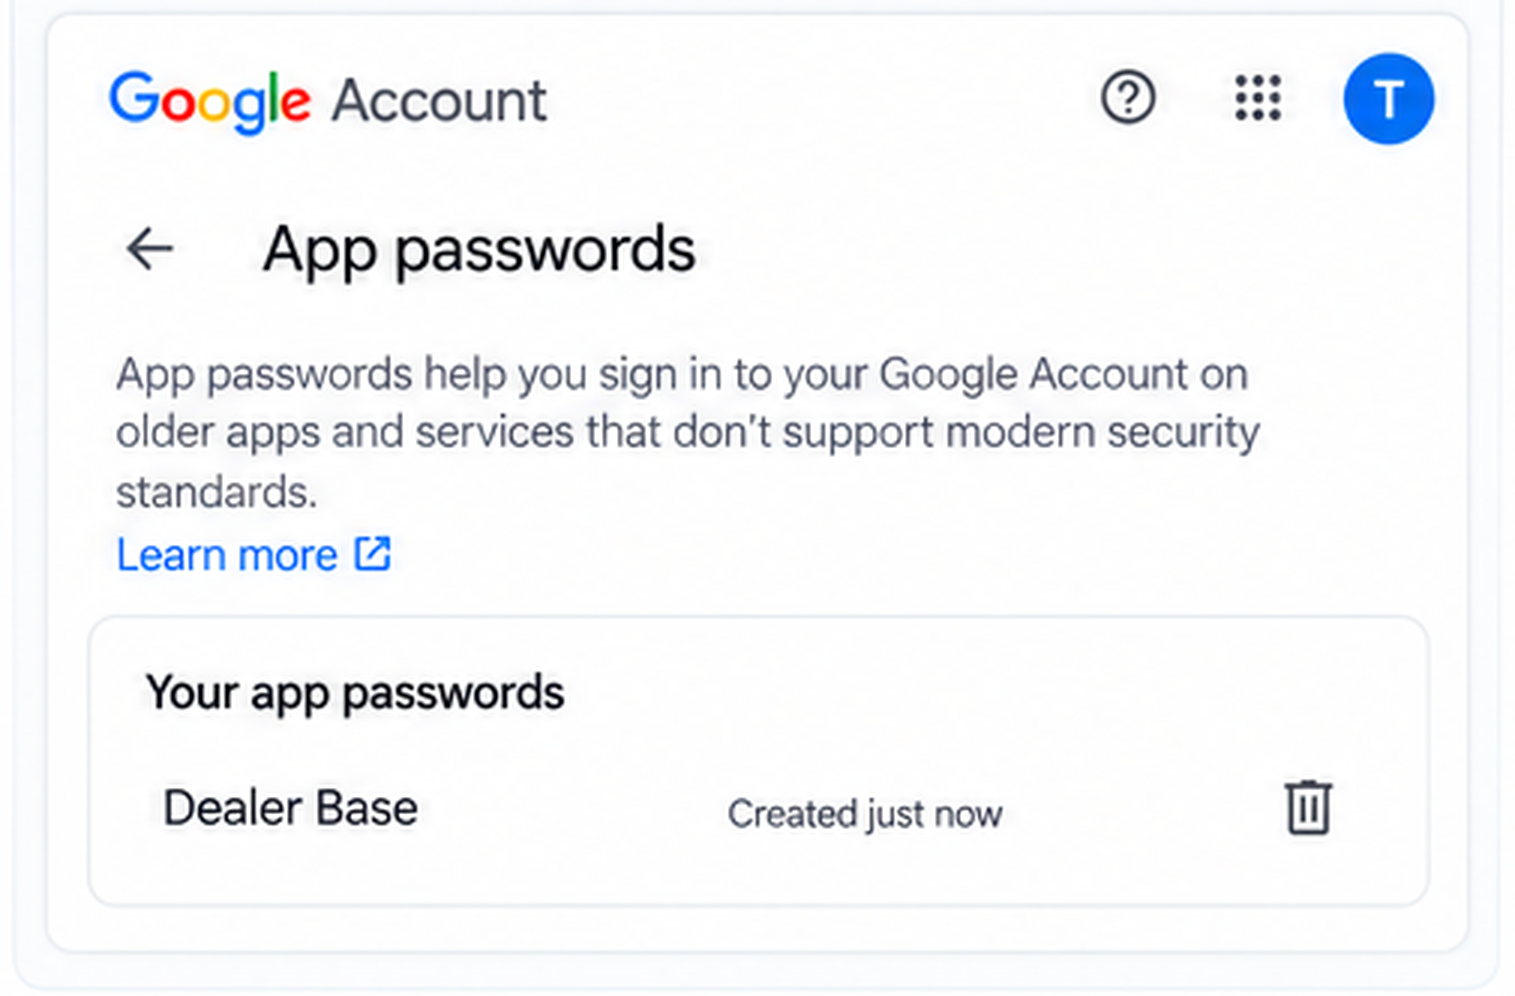
3c. Click Done. "Car Lots" is now in your list of app passwords.
Step 4 – Connect FluentSMTP
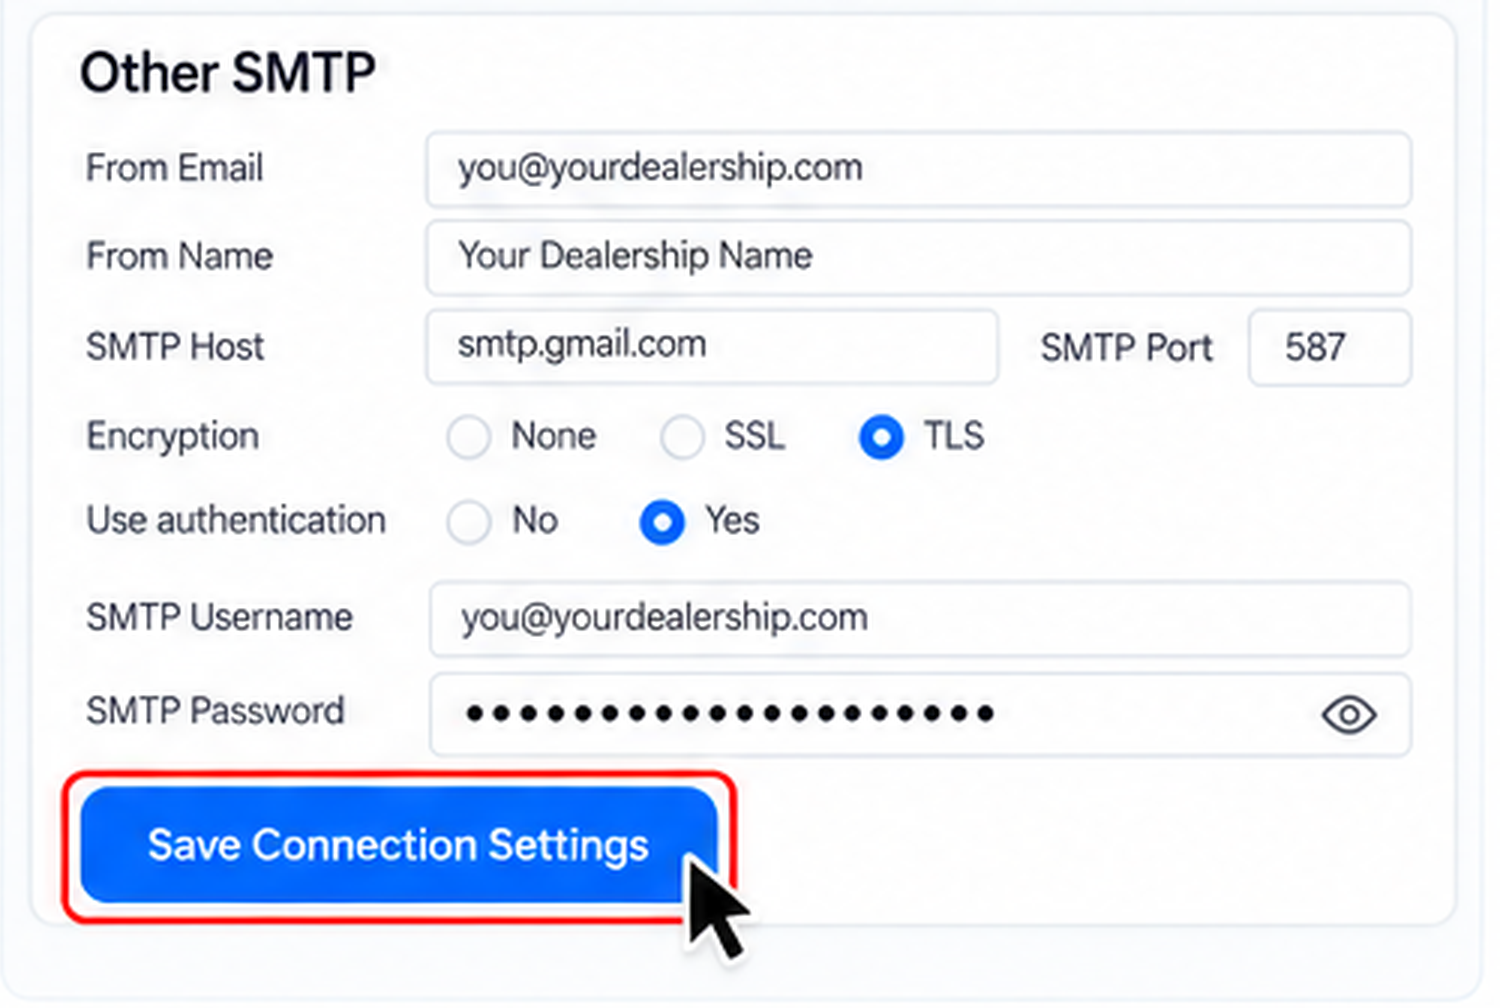
In WordPress: Settings › FluentSMTP › Add Connection › Other SMTP. Fill in:
| Field | What to enter |
|---|---|
| From Email | Your Gmail / business email address |
| From Name | Your dealership name |
| SMTP Host | smtp.gmail.com |
| SMTP Port | 587 |
| Encryption | TLS |
| Use authentication | Yes |
| SMTP Username | The same email address |
| SMTP Password | The 16-character app password |
Click Save Connection Settings.
Step 5 – Send a test email
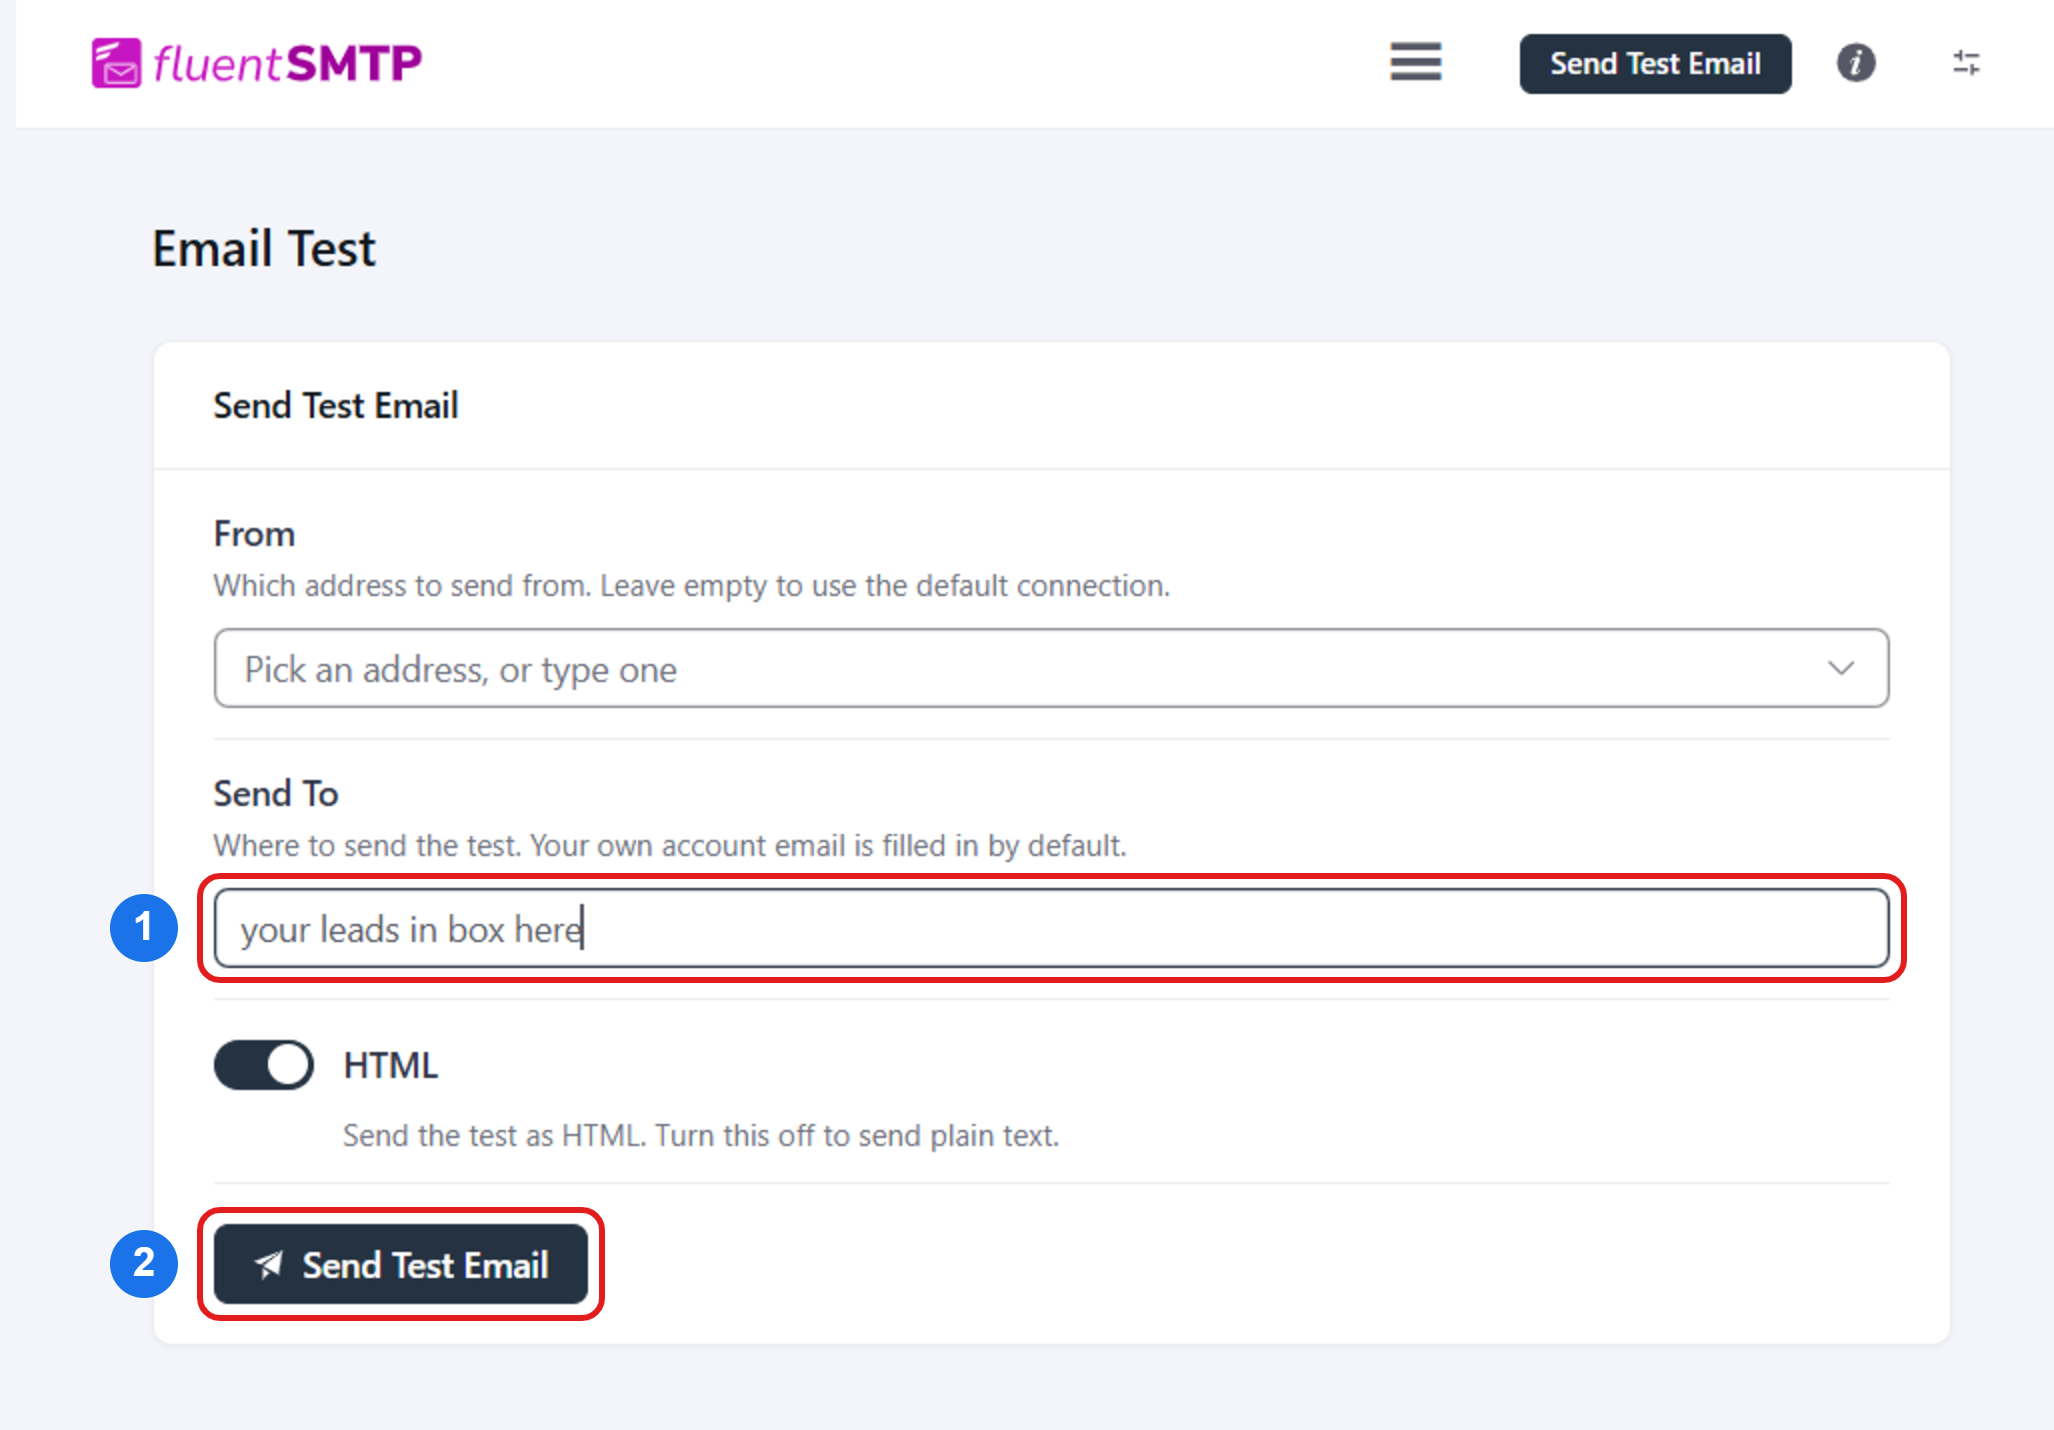
- In FluentSMTP click Send Test Email (top right) to open Email Test. Leave From empty.
- ① In Send To, type the inbox where you want leads → ② click Send Test Email.
- Check that inbox (and spam). It should be there in a minute.
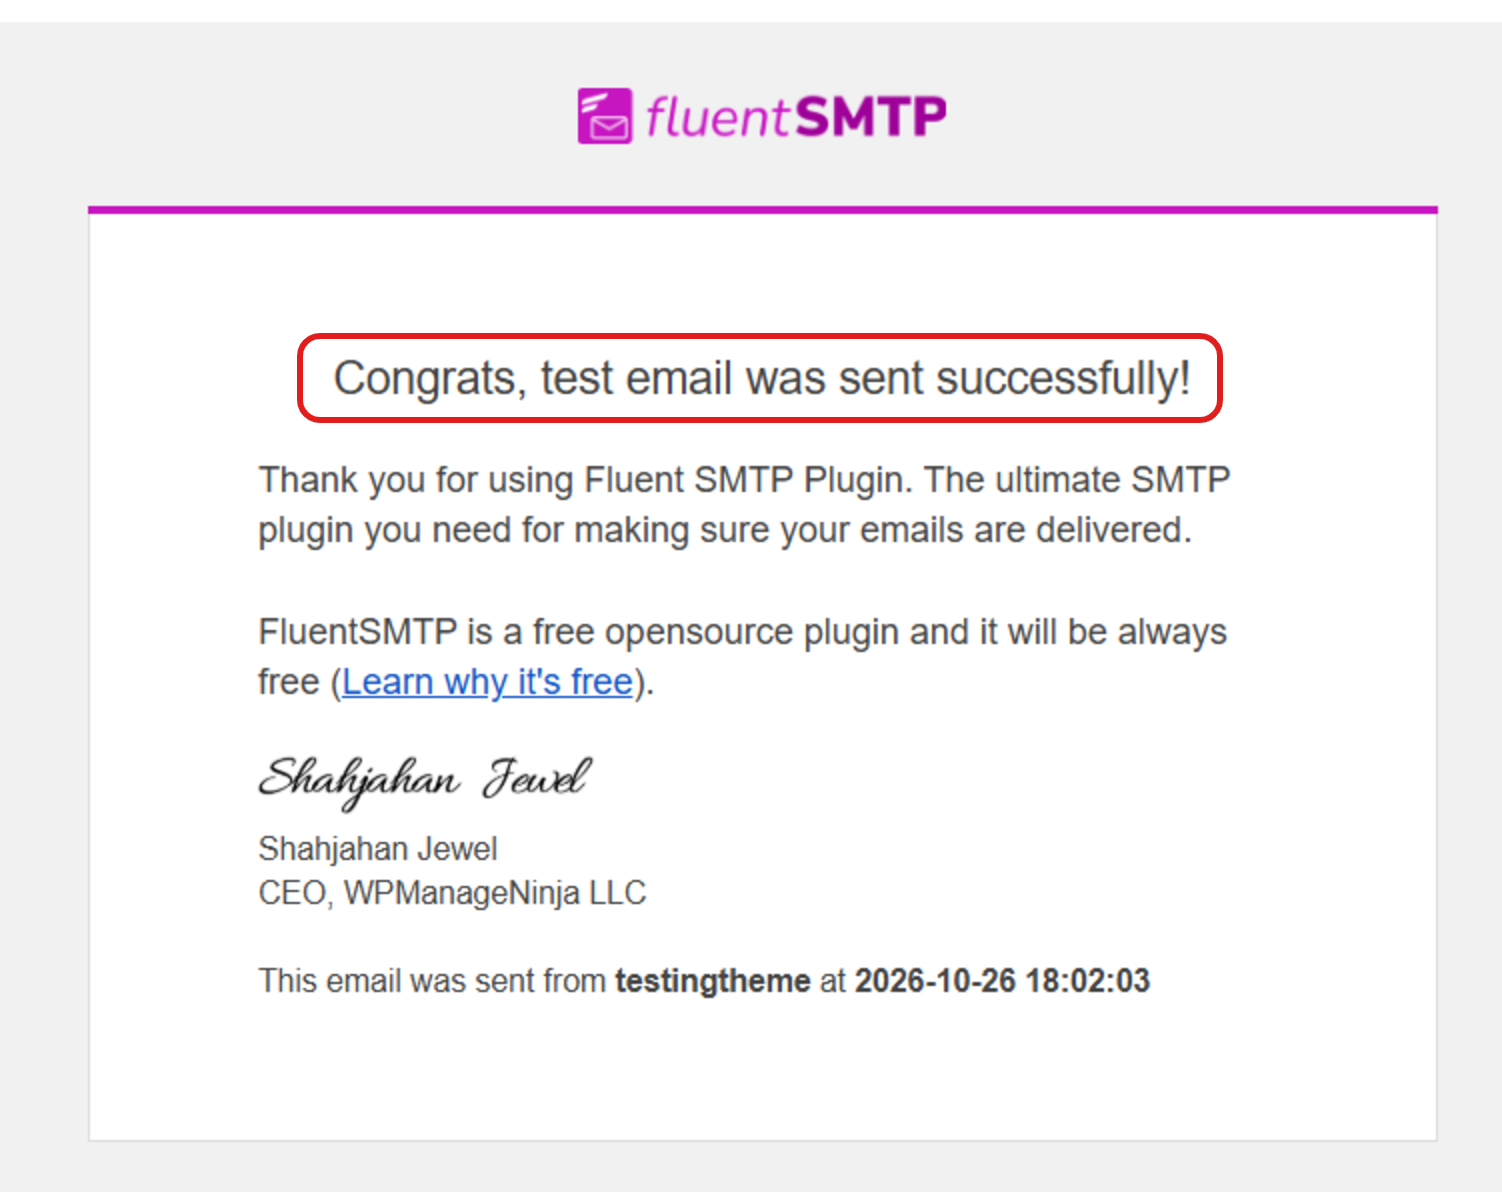
Done right? The test email arrives in that inbox: "Congrats, test email was sent successfully!" If it's in Spam, mark it "Not spam".
Step 6 – Tell the website who gets leads
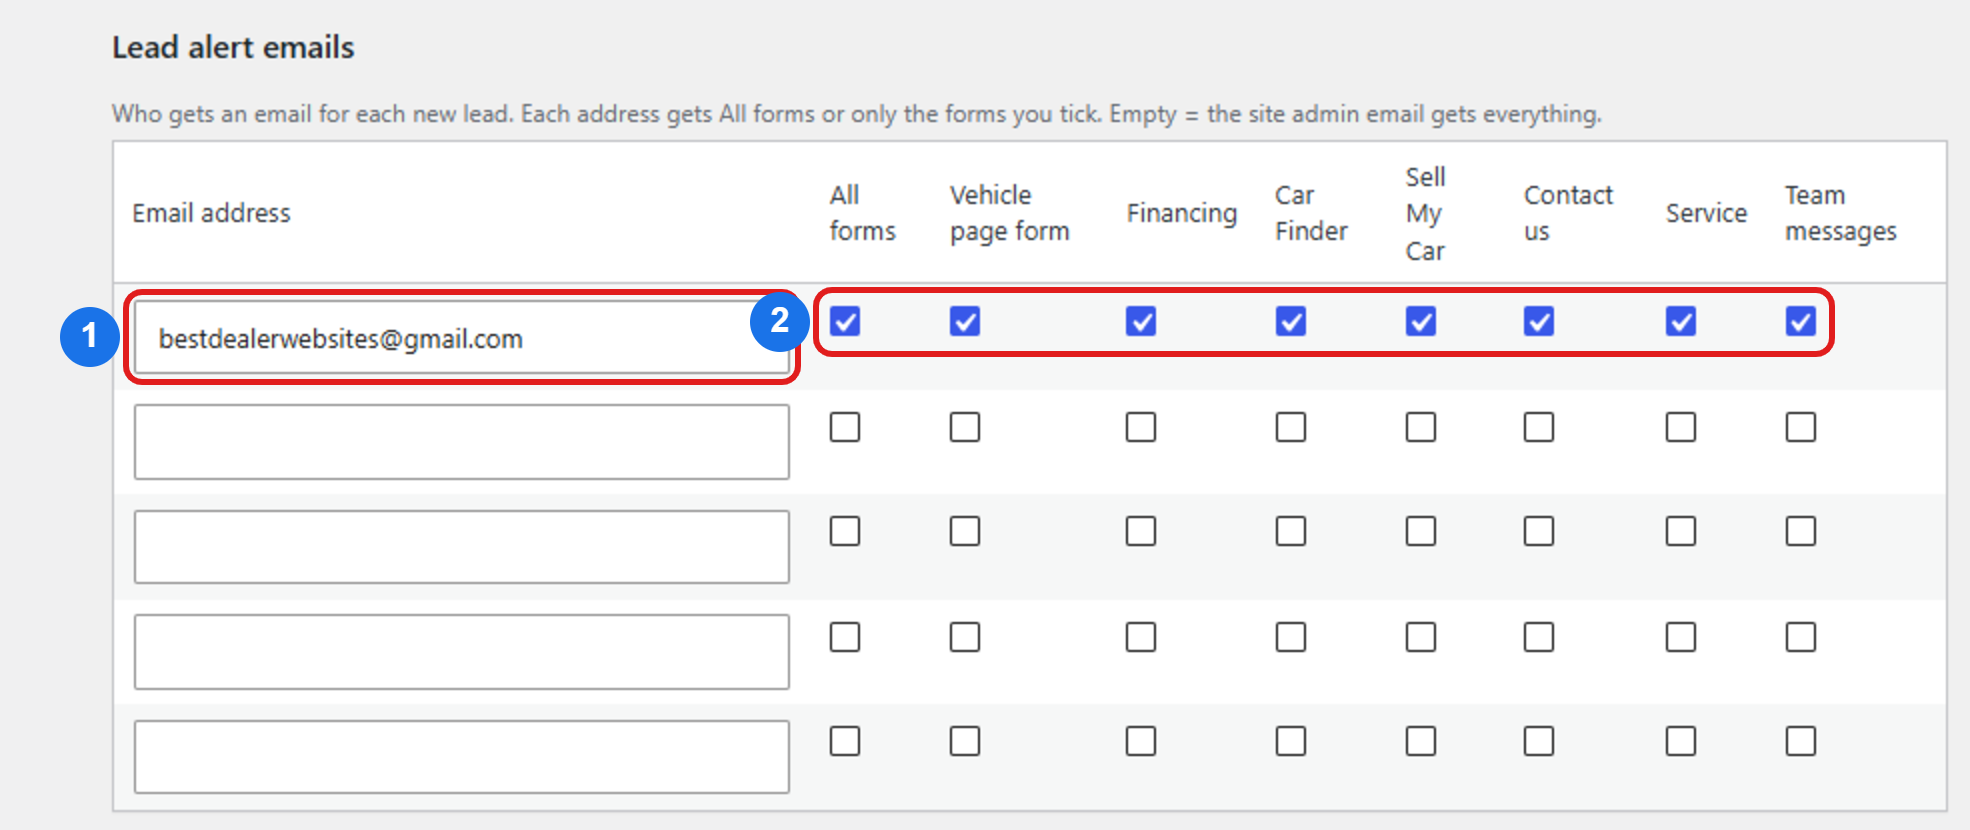
- Go to Car Lots › Forms & leads. Under Lead alert emails:
- ① Type each address that should get lead alerts (one per row). ② Tick All forms, or only the forms that person handles. Empty = the site admin email gets everything.
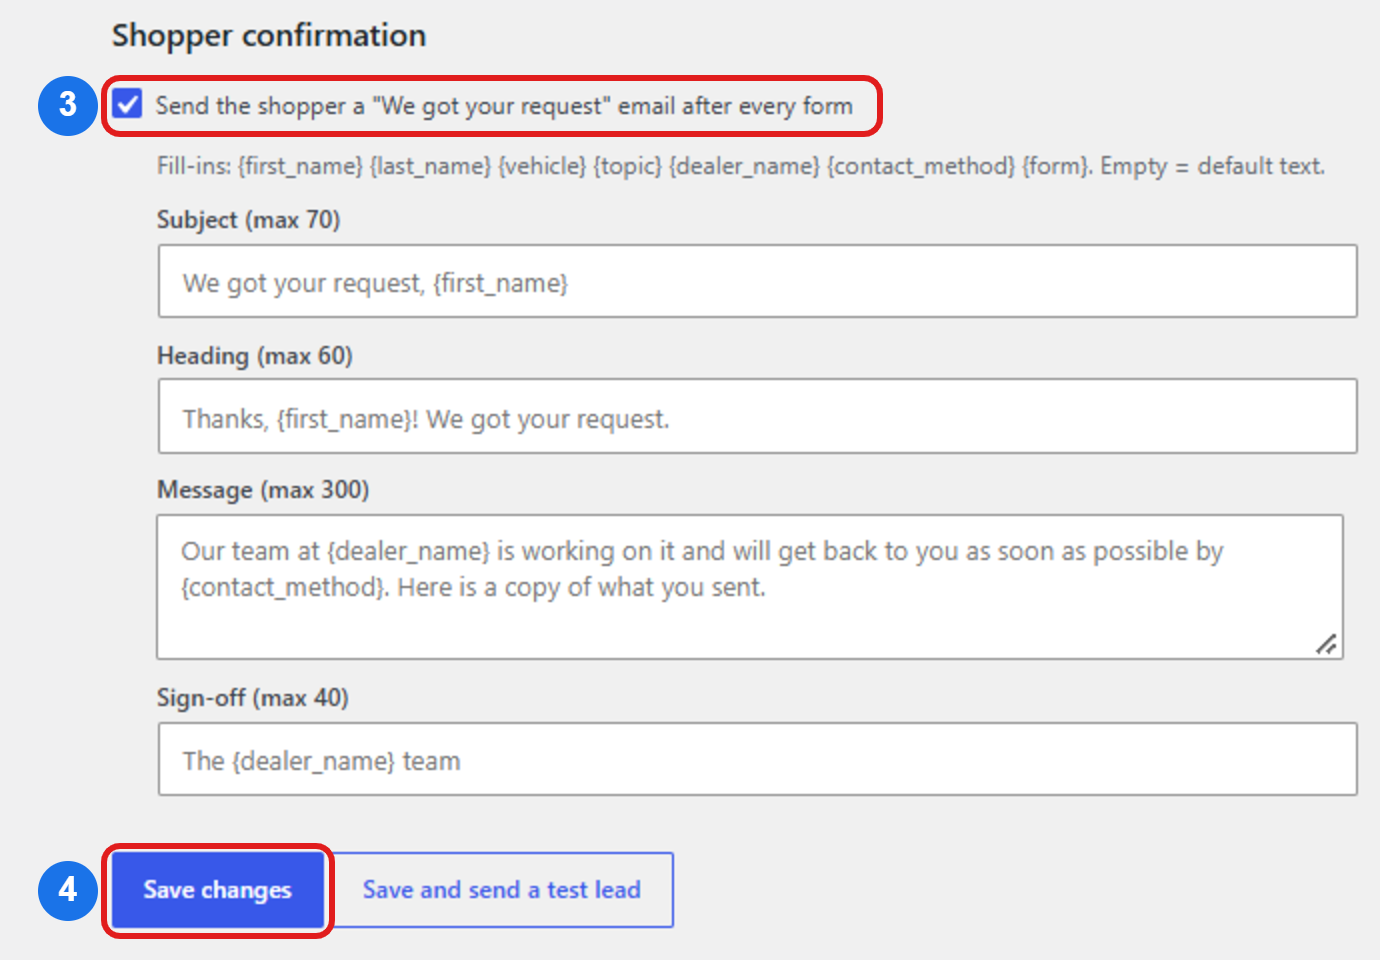
- ③ Scroll down to Shopper confirmation and leave Send the shopper a "We got your request" email ticked. You can change its subject and message right there.
- ④ Click Save changes. ("Save and send a test lead" also sends you a sample lead.)
Step 7 – Try a real lead
- On your website, send the Contact form using your phone's email as the shopper.
- You get the lead alert. Your phone gets the "We got your request" email.
- In FluentSMTP › Email Logs both say Successful.
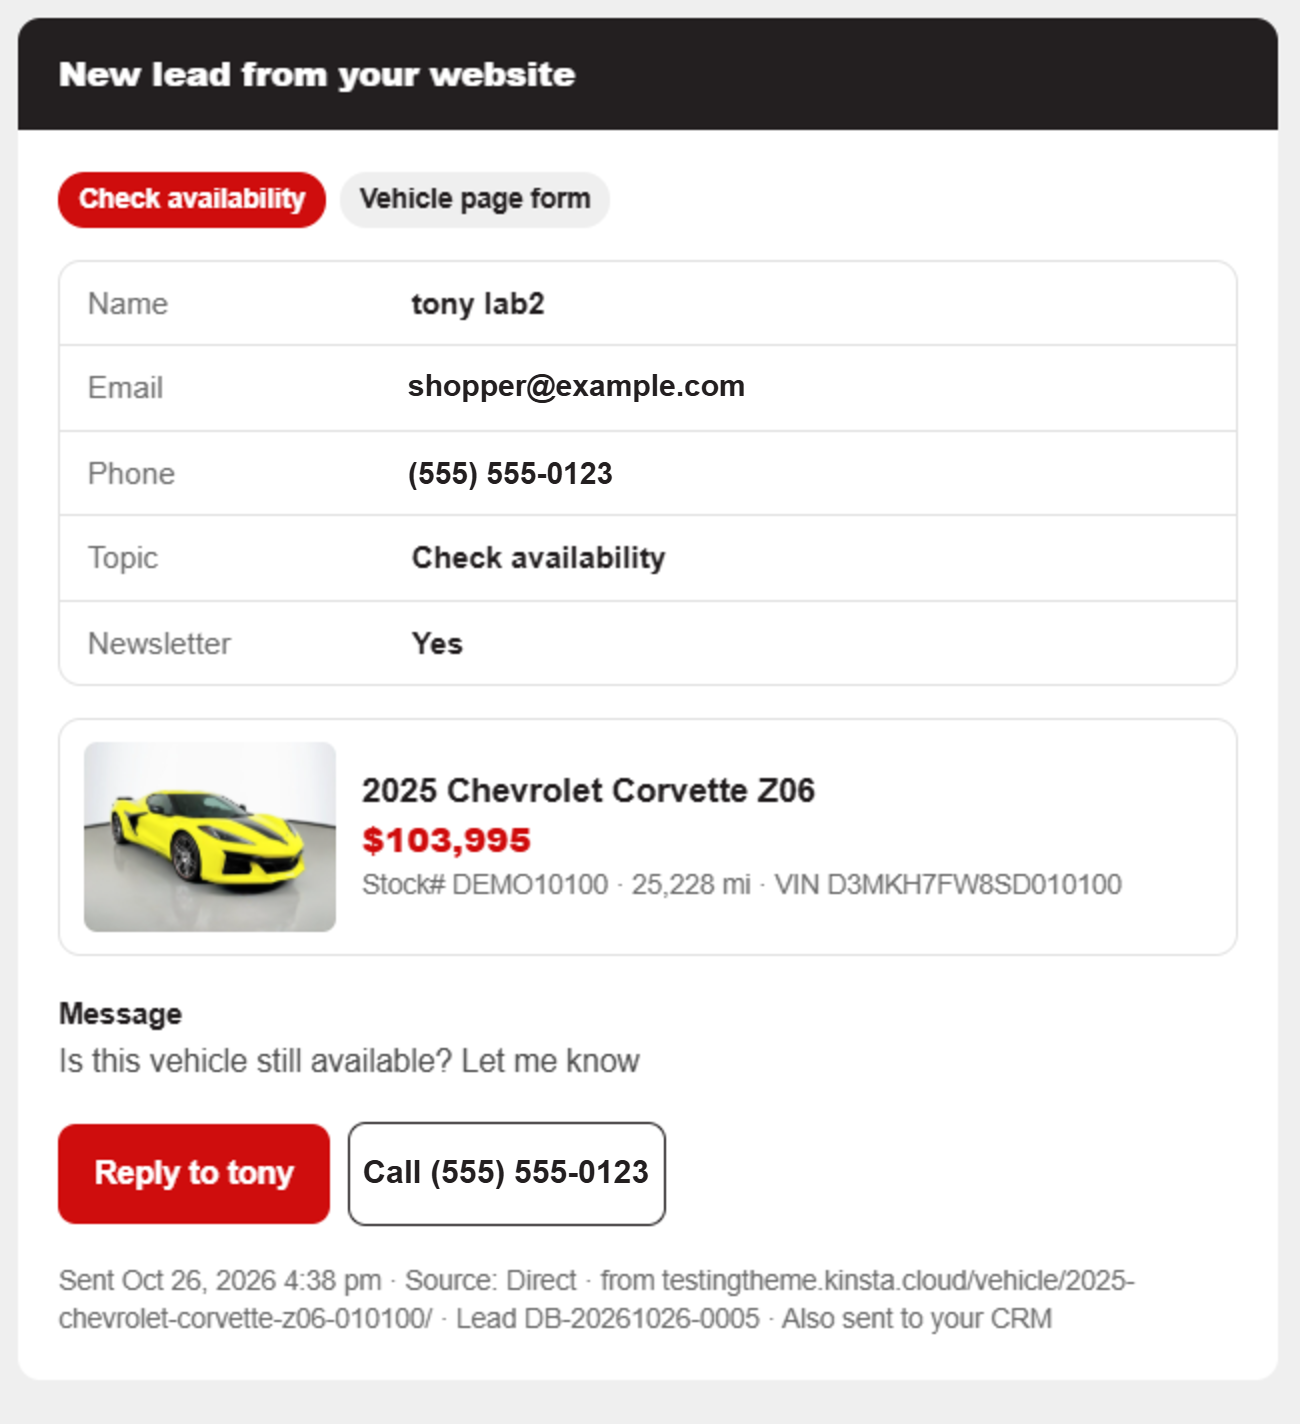
Done right? Within a minute every lead recipient gets a "New lead from your website" email like this:
Not using Gmail?
- Microsoft 365 / Outlook: FluentSMTP › Add Connection › Outlook / Office 365 and follow the on-screen steps (your IT person may need to help).
- Other email (web host, GoDaddy…): ask your provider for SMTP host, port, encryption, username and password, then use Other SMTP.
Tips
- Emails in spam? Send from an address on your own domain and ask your email provider to add SPF, DKIM and DMARC records.
- Changed your Google password? Create a new app password and paste it into FluentSMTP.
- Stuck? Send a screenshot of FluentSMTP › Email Logs to your website support.
Other ways to connect
The steps above use Gmail. Using a different email? Find yours below.
| Your email | What to do |
|---|---|
| Gmail (…@gmail.com) | 1. Turn on 2-Step Verification. 2. Create an app password named Car Lots and copy the 16-letter code (shown once). 3. Settings › FluentSMTP › Add Connection › Other SMTP: host smtp.gmail.com, port 587, TLS, username = your Gmail, password = the code. Save.Full steps (pick "Gmail or Google Workspace") › |
| Google Workspace (…@yourdealer.com) | Same as Gmail with your business address. No "App passwords"? Use Add Connection › Google Workspace / Gmail and follow the on-screen steps. Full steps (pick "Gmail or Google Workspace") › |
| Microsoft 365 / Outlook | Add Connection › Outlook / Office 365 and follow the on-screen steps. Your IT person may need to help. Full steps (pick "Outlook or Office 365") › |
| Email sending service (SendGrid, Brevo, Mailgun, Amazon SES, Postmark, SMTP2GO…) | 1. Sign up with the service and verify your domain (it gives you a few DNS records to add – your web person or domain host can do this). 2. Create an API key in the service. 3. Settings › FluentSMTP › Add Connection › pick the service by name › paste the API key › From Email = an address on your verified domain. Save. Full steps for SendGrid › Full steps for Brevo, Mailgun, Amazon SES, Postmark, SMTP2GO › |
| Other (web host, GoDaddy…) | Ask your provider for SMTP host, port, encryption, username and password. Enter them under Other SMTP. Full steps (pick "Any Hosting Email Service") › |
- Gmail / Workspace / Outlook: quickest if you already use them. Fine for most dealers. These have daily sending limits and are meant for normal mail, not bulk.
- Email sending service: best delivery (fewer emails in spam), detailed logs, and room to grow (newsletters, follow-up emails later). Needs your own domain (…@yourdealer.com) and a few DNS records. Most have a free or low-cost starter plan – check the service's pricing page.
- Your website doesn't care which you use: every lead alert, CRM (ADF) email and shopper confirmation goes through the connection you set up here.