
Dealer guide
Import your inventory feed
Connect your inventory provider once and your cars update by themselves every day. About 10 minutes.
You need:WordPress admin login · your feed link from your provider (or FTP/SFTP login, or the file) · the name of your provider (vAuto, HomeNet…)
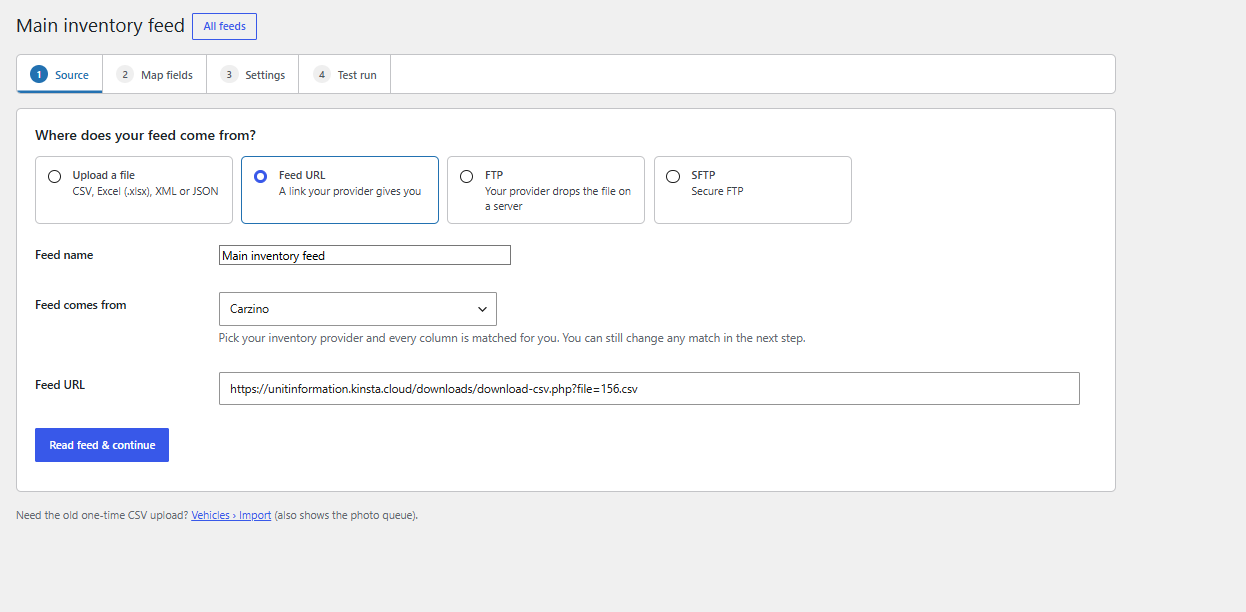
Step 1 – Source: where your feed comes from
- Go to Vehicles › Import feeds and click Add feed.
- Pick how the feed arrives: Feed URL (most common), FTP, SFTP or Upload a file.
- Give it a name (e.g. "Main inventory feed").
- Feed comes from: pick your provider. Every column is matched for you.
- Paste the feed link and click Read feed & continue.
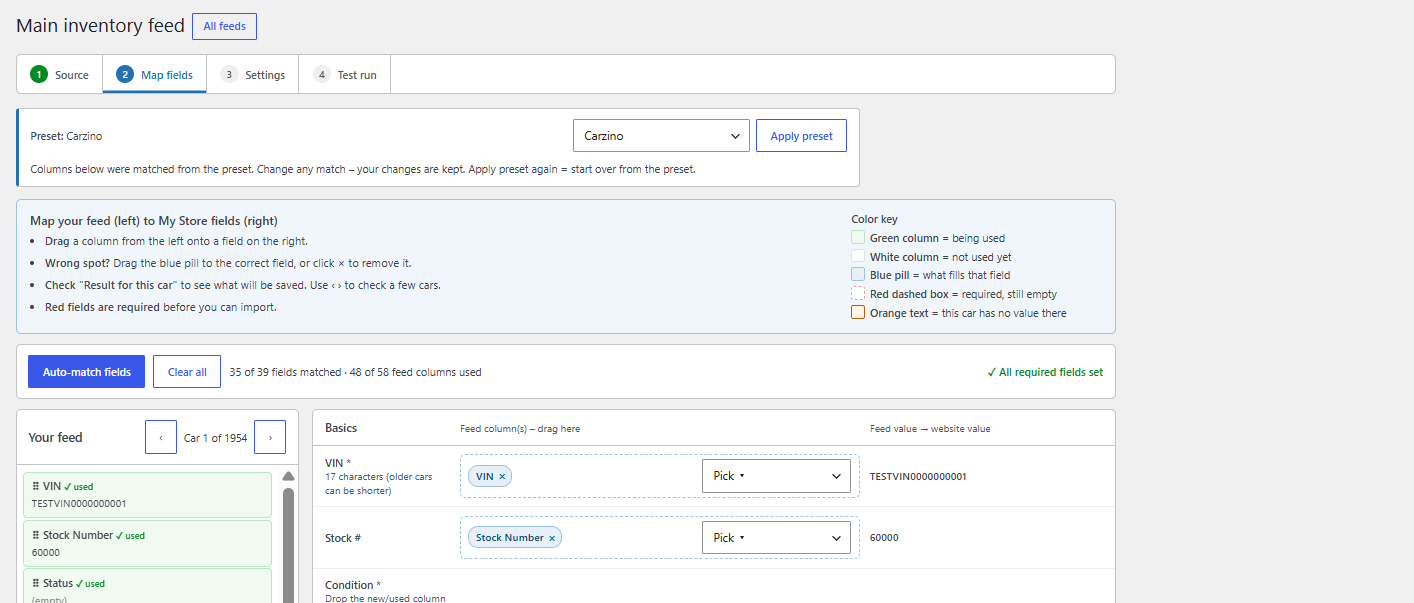
Step 2 – Map fields: check the matches
- The bar at the top shows your preset and how many fields matched (e.g. 35 of 39 fields matched).
- Look for ✓ All required fields set on the right. Red dashed boxes still need a column.
- Wrong match? Drag a column from Your feed (left) onto the right field, or click × on the blue pill.
- Use ‹ › to look at a few cars. "Feed value → website value" shows what will be saved.
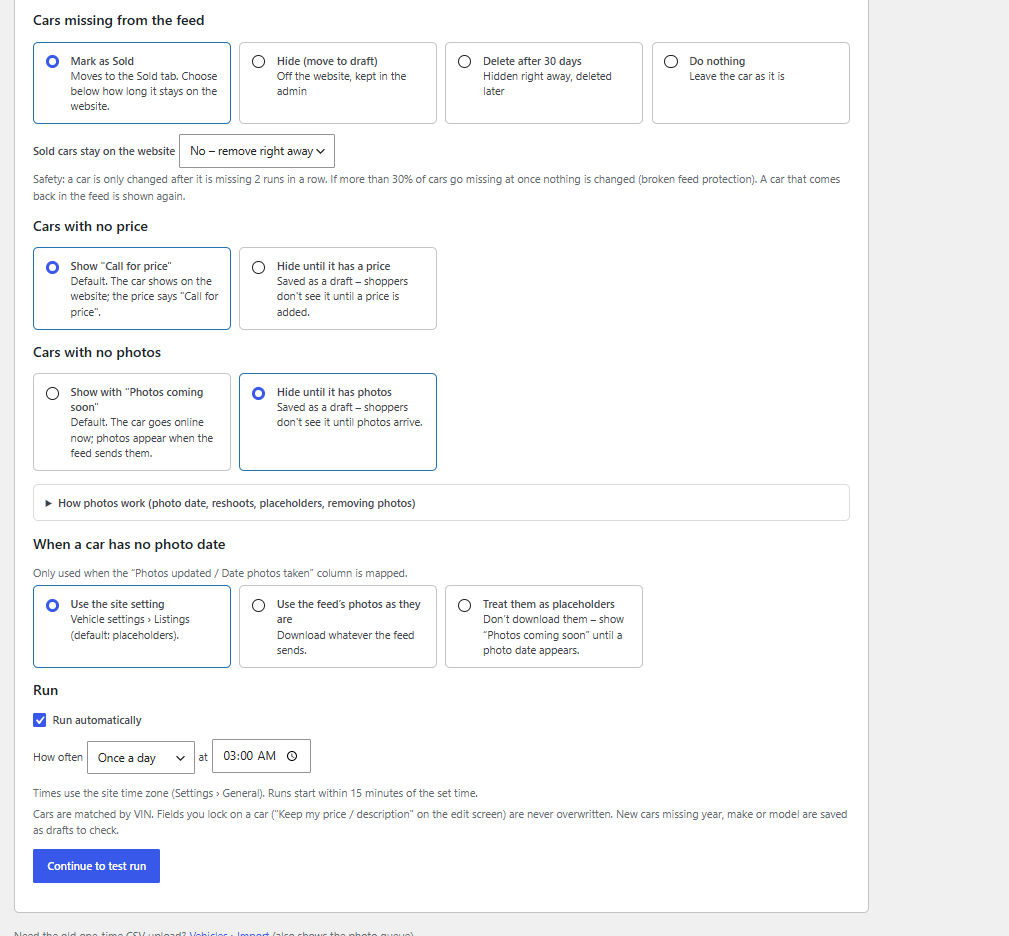
Step 3 – Settings: your choices
- Cars missing from the feed: Mark as Sold (recommended), Hide, Delete after 30 days, or Do nothing. Then how long sold cars stay on the website.
- Cars with no price: show "Call for price", or hide until it has a price.
- Cars with no photos: show "Photos coming soon", or hide until photos arrive.
- Run: tick Run automatically, then once a day at a time (e.g. 3:00 AM) or every 1–12 hours.
- Click Continue to test run.
Step 4 – Test run, then import
- The test run shows what will happen (new, updated, missing) before anything changes.
- Looks right? Click Import. Cars go live right away; photos download in the background.
Done right? A green box shows the result, and the feed shows its schedule and last run. Open Import history to see the last 30 runs.
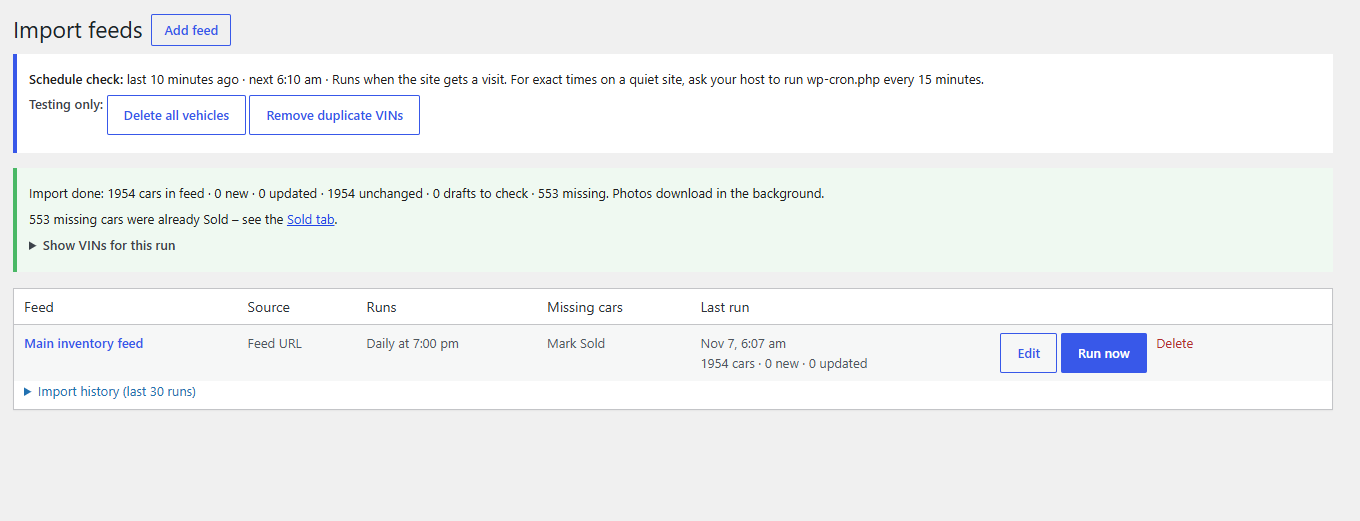
Later: Run now imports right away · Edit changes any step · if an import fails you get a red alert in WordPress and an email. Full details: Dealer guide, section 8.