
Dealer guide
Change your header and footer links (menus)
Choose which links show in your header menu and the four footer columns. About 10 minutes.
You need:WordPress admin login · the pages you want to link to
Step 1 – Open Menus
- Go to Appearance › Menus.
- No menu yet? Type a name (e.g. "Main menu") and click Create Menu. Have one? Pick it under Select a menu to edit.
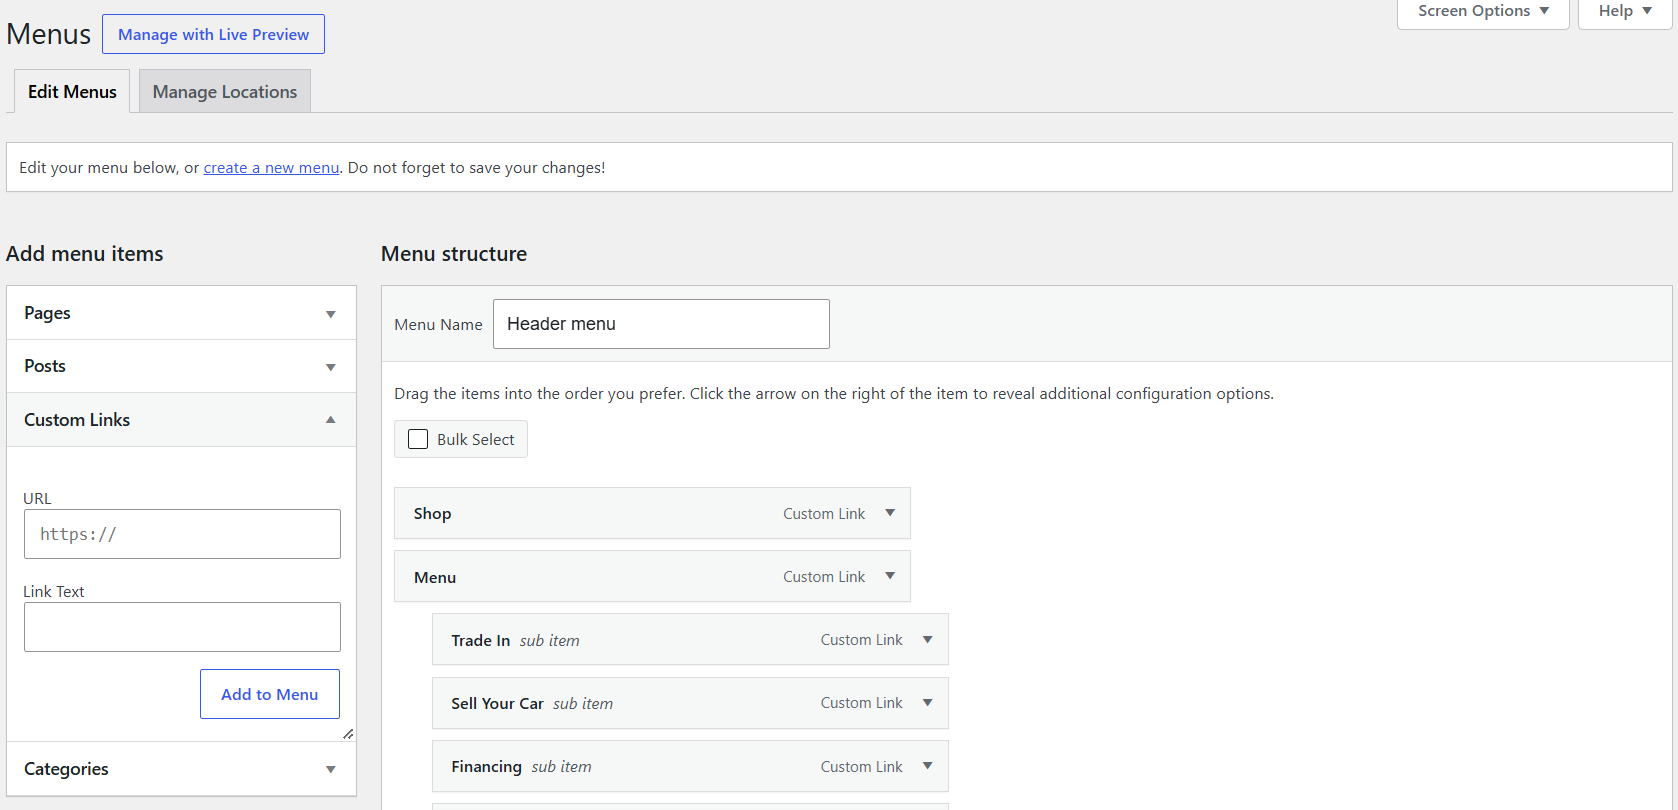
Step 2 – Add links
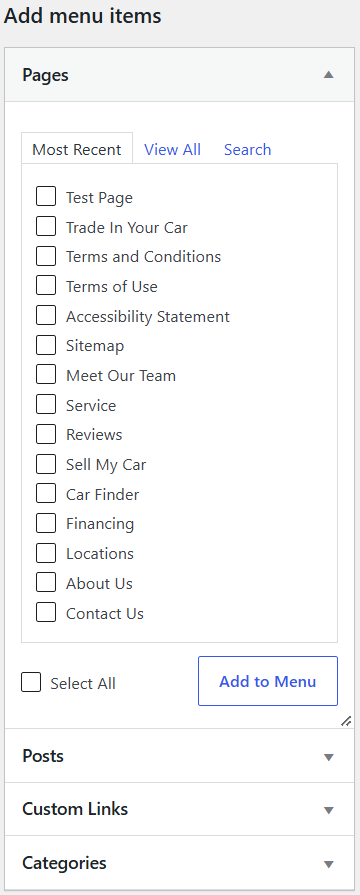
- On the left, tick pages under Pages and click Add to Menu.
- Link to something else (e.g. your inventory filtered to trucks)? Open Custom Links, paste the address, type the link text, Add to Menu.
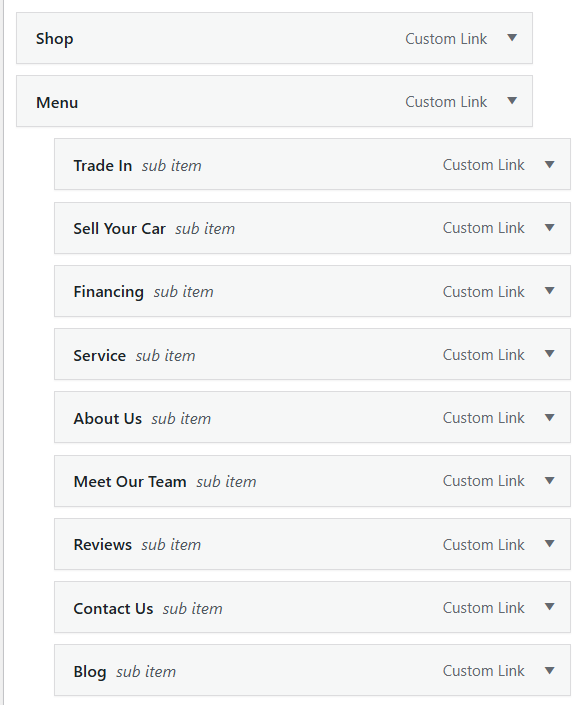
Step 3 – Order and drop-downs
- Drag items up and down to change the order.
- Drag an item slightly to the right, under another item, to put it in that item's drop-down (e.g. under "Menu").
- Click an item's arrow to rename it (Navigation Label) or Remove it.
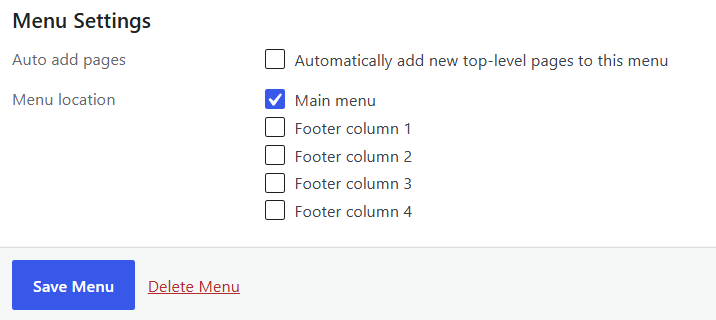
Step 4 – Pick where it shows
- Under Menu Settings › Display location, tick Main menu (header) – or Footer column 1–4 for a footer menu.
- Click Save Menu.
- For the footer, make one menu per column (e.g. "Footer – Shop") and tick its column.
Footer menus (one per column)
Your footer has 4 columns. Until you give a column its own menu, it shows ready-made links (Shop, Buy & Sell, Our Dealership, Help). To change a column:
- At the top of Appearance › Menus, click create a new menu.
- Name it (e.g. "Footer – Shop") and click Create Menu.
- Add the links you want (Pages or Custom Links › Add to Menu).
- Under Menu location, tick Footer column 1 (or 2, 3, 4). Click Save Menu.
- Repeat for each column you want to change. Switch between menus with Select a menu to edit at the top.
Done right? Refresh your website. The header shows your links; on phones they're in the slide-out menu.
Good to know: Favorites and Compare are icons in the header, so you don't need links for them. No menu set? A ready-made one is used. Changes not showing? Clear your site cache. Full details: Dealer guide, section 15.